
Years ago, I shared that I wanted to learn how to make a braided rug. While I’m not the speediest person out there, I’m faithful and slowly but surely finish projects that I’ve set out to do!
Making a braided rug ended up being just as enjoyable as I hoped! I love the vintage look of a braided rug and confess I am already dreaming about my next one. I love the process of picking fabric colors and watching the effect as they come together. If you’ve been looking for a new project to try, this just might be it!
No Pressure
First off, let me just tell you – don’t wait to pursue a project because you don’t have a lot of time for it right now. I totally get that, but believe me when I say life will pass you by and you’ll never have taken the time to do the things you wanted to. I realized that was slowly happening to me, and that’s not the way I want to live!
So now I look for a project to try or a class to pursue and I do it little by little. I don’t stress if it’s taking me a long time, but rather delight in the enjoyment of the process.
To be honest, I’ve been working on this braided rug since late 2020 and only finished it July 2022. Now I don’t think I worked on it much in 2021 so it is my own fault it took so long, but I didn’t stress over it, rather let it take a back burner while I worked on other things. But now it’s done and I am so excited to share it with you!
Choosing Your Fabric and Colors
I love fabric and putting colors together, so this may well be my favorite part! You can either cut strips out of fabric or you can use precuts from a jelly roll. I opted to use precuts from a jelly roll that I already had on hand. The fabrics have sweet, little prints in pastel colors that blend together gorgeously. I paired them with a solid white so that the colors weren’t too busy.

I laid the fabric strips out in a pleasing color progression, pairing similar fabrics colors. (A braid requires three strands of course, so picture each of these with a third strip of white fabric.)
I ended up having to buy a second jelly roll to complete the rug and couldn’t get one identical to the first, but found something similar in terms of colors and theme. The original jelly roll is on the left, the second on the right.
How to Make a Braided Rug
I found a video that really helped me get started – https://youtu.be/h2FVGzFCyCc
Start off by laying your first three fabric pieces together, fan them out slightly, just offset from one another. Stitch across the top of them. Secure them to a tabletop with a piece of tape to give yourself good resistance to pull against. Start braiding! It is important that you maintain a consistent gauge in your braid – be it tight, loose, or in between – just keep it consistent!
As you get to the end of a fabric strip, fold over the very end and snip a small hole in the fabric. The idea is to create a little keyhole in the fabric. Do the same with the new piece that you will be attaching. Bookmark tie the fabric strips together, so to speak. (perfectly demonstrated in the video shared above at about the two minute mark). Braid away!
Sewing Your Braided Rug Together
Once you have completed braiding your rug, you will need to sew it together. Some people do this by hand, but I opted to use a zig-zag stitch on my machine.
Again, the video I referenced above is super helpful in giving you a feel for how this will go. At about the 3 minute mark you will see how to curl the braid around, while holding it flat to start the process. It is important to keep the entire rug nice and smooth as the project size grows. One tutorial I read suggested using books around your machine to make your work surface flat.
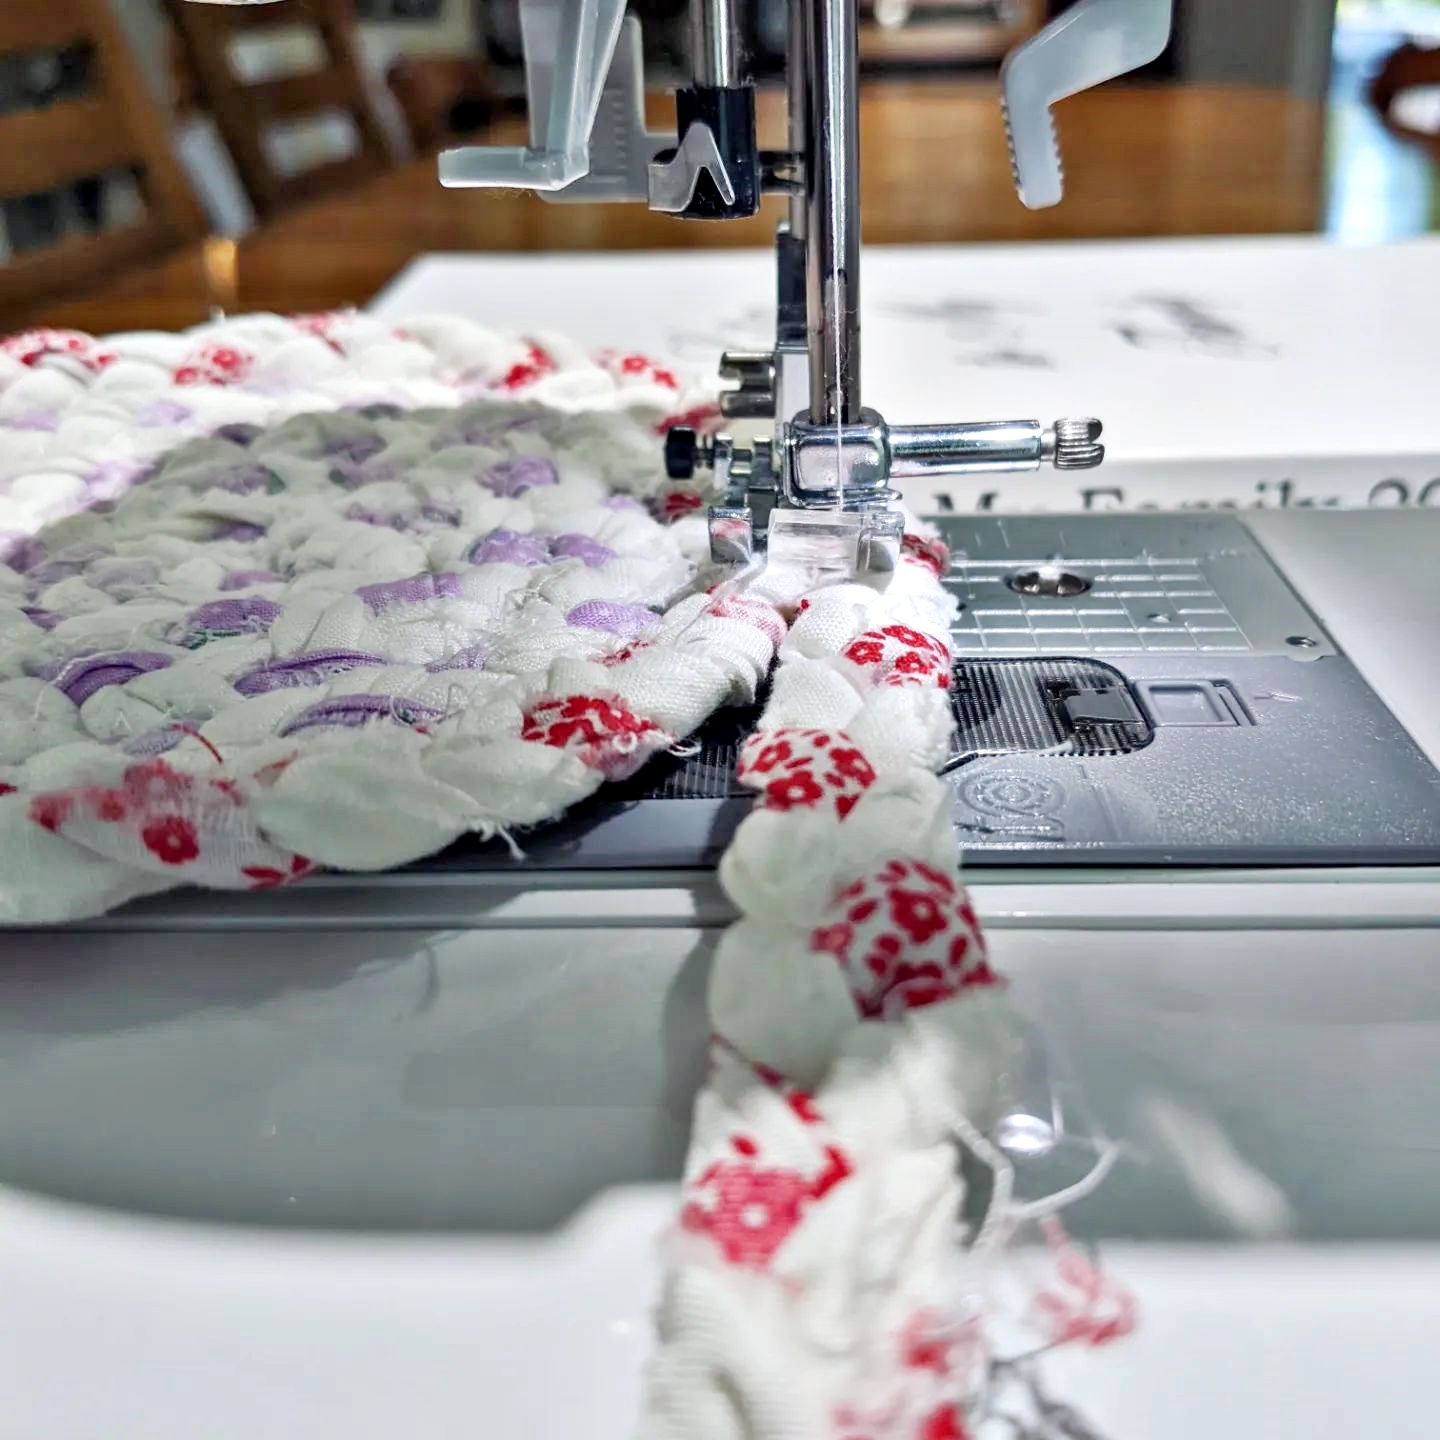
If you’re like me and disregard this step, you will probably end up having to seam rip your rug as it will end up bowl shaped. Second time around I stacked books and magazines to the height of my sewing machine base and that kept the rug nice and flat!
Would I Do It Again?
Hands down, Yes! Especially armed with tips that only come from real life experience!
Do be sure you have enough fabric for your project. (I used approximately 2-2/3 jelly roll packs – two printed packs and 2/3 of a solid white pack. My rug is about 24″ in diameter.)
Do keep your braid gauge consistent. (Without realizing it, I started braiding and then tightened it up as I went along. I had to go back and fix the beginning in order for it to lay right.)
Do properly prepare your area for keeping your rug flat as you sew it together. (As mentioned above, I didn’t initially and wound up with a bowl shaped rug. Also, seam ripping a zig zag stitch is no joke!)
Do consider which way the rug will grow as you are sewing it together so that the rug itself is not trapped inside your sewing machine arm. (Just going to say it again, keep it flat!)
Have fun with your rug! Choose colors that would work in specific rooms or for specific seasons! I rather want to make a super muted aqua one for my room next! We’ll see how all my other 47 projects go before I start that though 😉
Until Next Time!
Hope.
PS. Other ideas you might enjoy: https://www.theamericanlady.com/category/ideas/